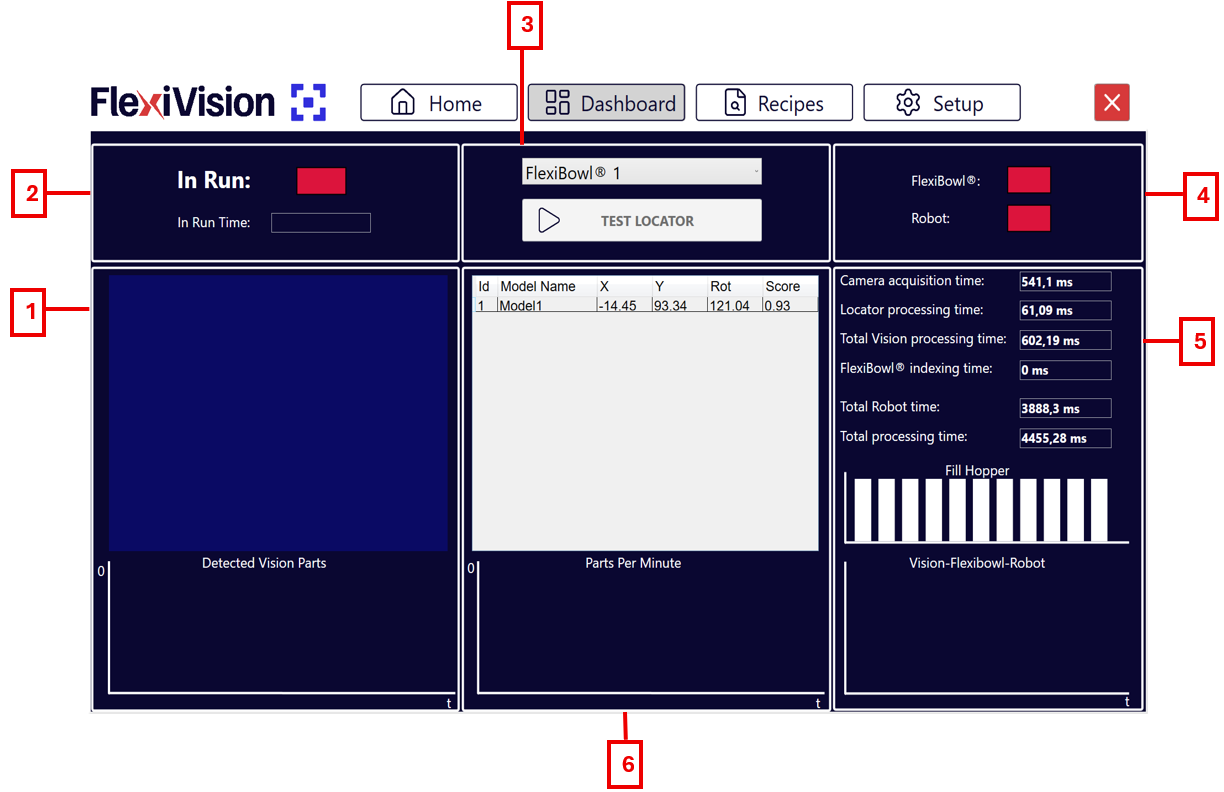
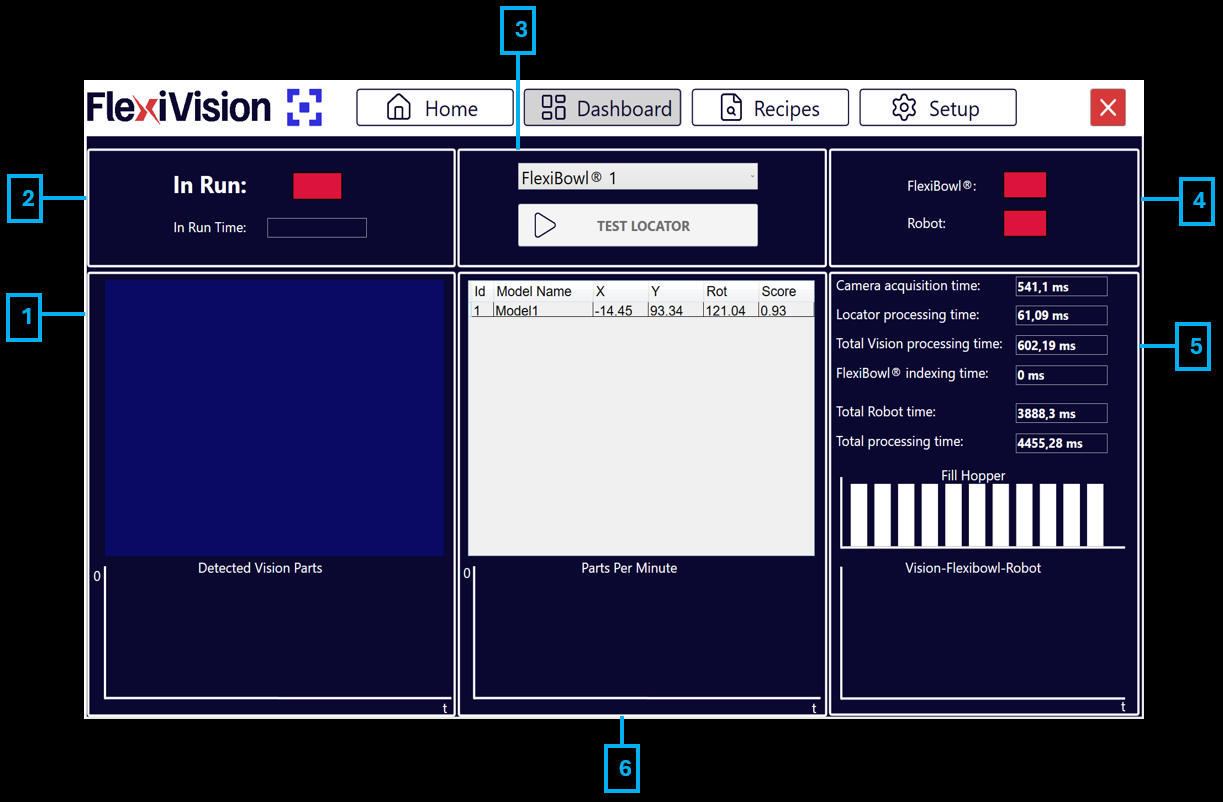
DashBoard page#
# |
Description |
|---|---|
1 |
Vision and Detection Area
|
2 |
Operating Status
|
3 |
Controls and Selection
|
4 |
Connection Status
|
5 |
Timings Analysis
|
6 |
Performance Graphs and Log
|
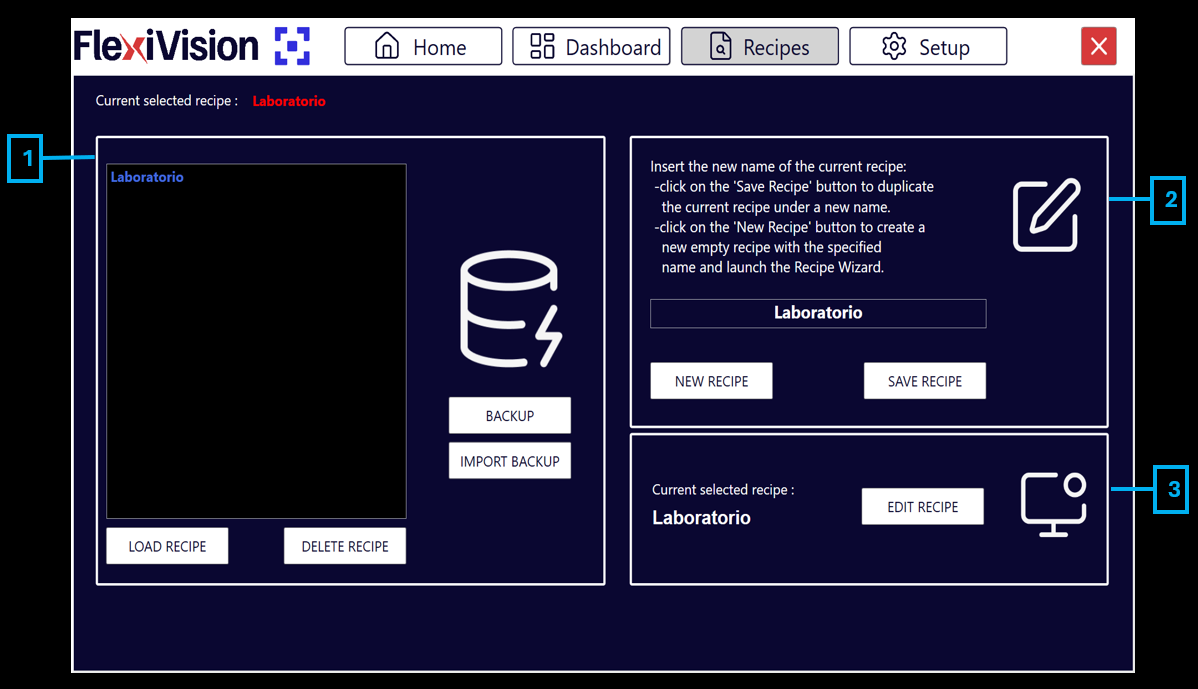
Recipes page#

# |
Description |
|---|---|
1 |
Recipe Database Management
|
2 |
Creating and Saving
|
3 |
Edit Recipe
|
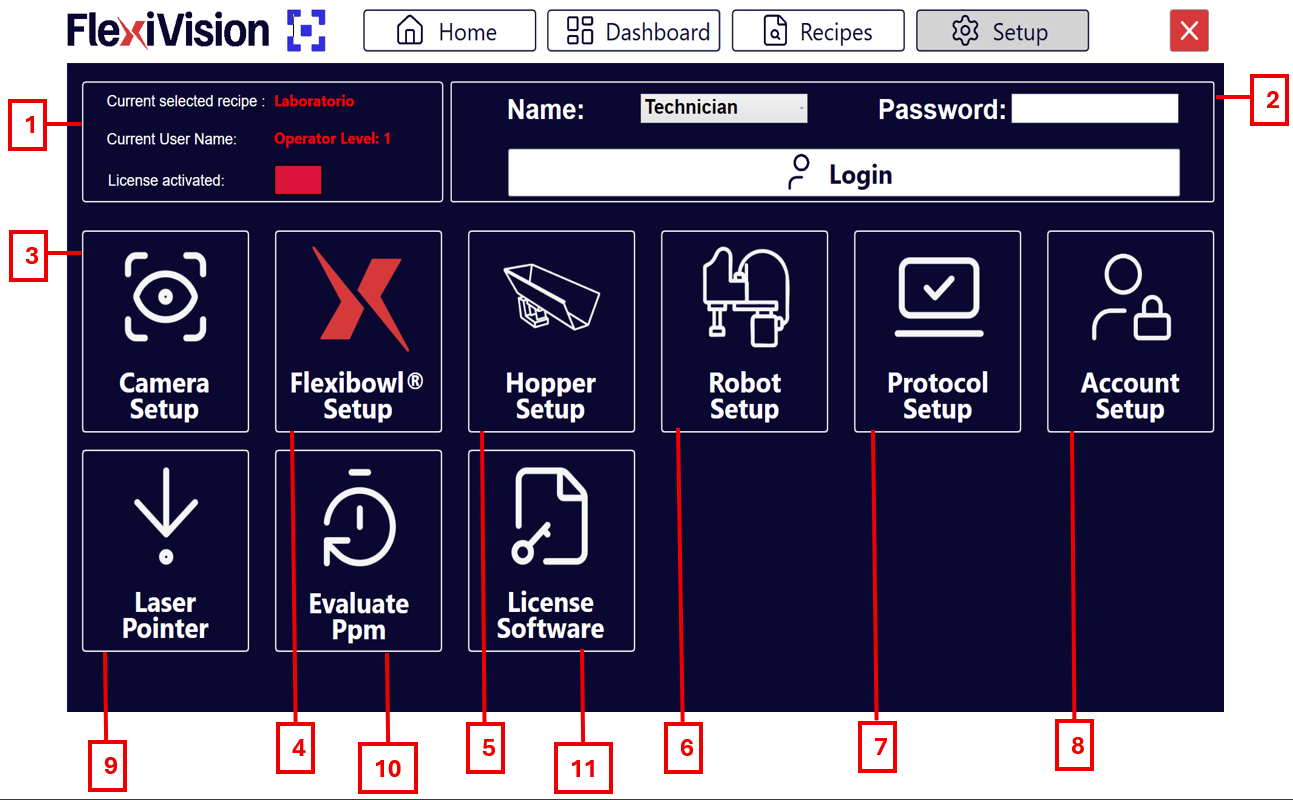
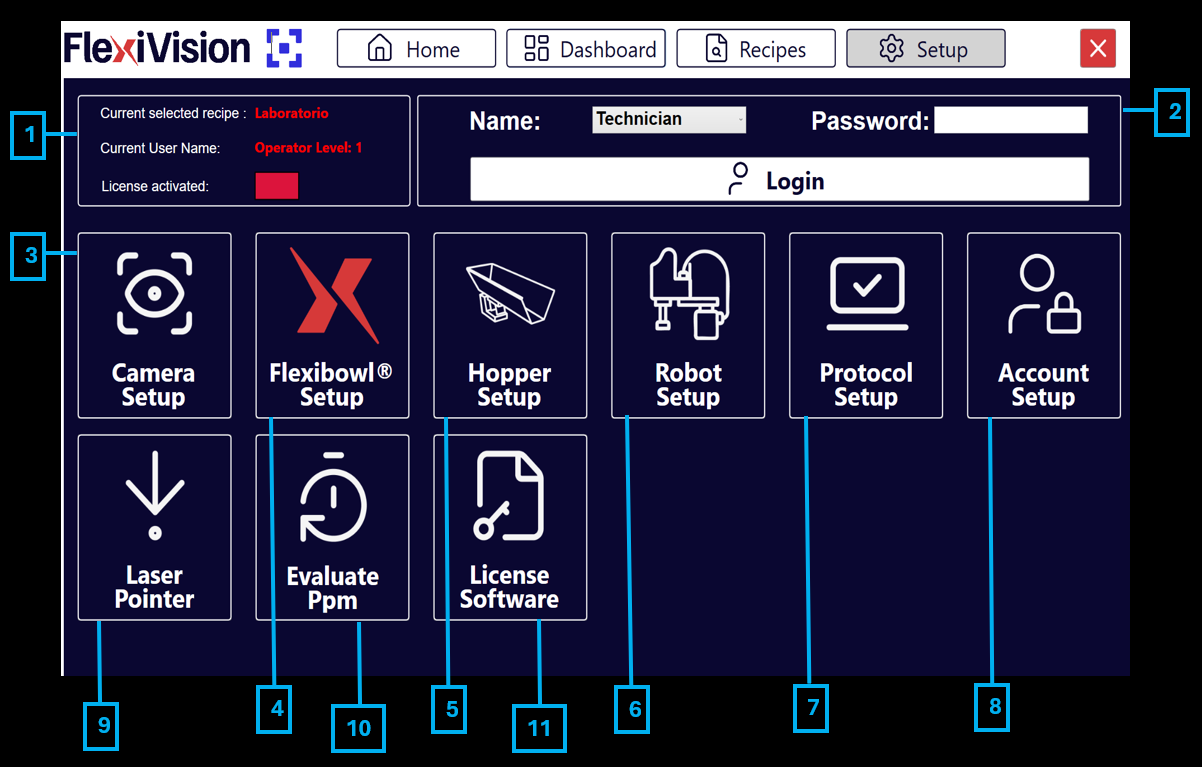
Setup Page#
# |
Description |
|---|---|
1 |
Status Information
|
2 |
Access Panel
|
3 |
Camera setup: section dedicated to the configuration of camera parameters. |
4 |
FlexiBowl® setup: area for setting the movement and control parameters of the FlexiBowl®. |
5 |
Hopper setup: configuration of hopper parameters (vibration and discharge). |
6 |
Robot setup: section for configuring robot communication. |
7 |
Protocol setup: parameter configuration page defining how many objects the vision must or can return in each cycle, in what order they are prioritised and which statistical values to use based on the number of robot picks and the maximum time to manage each component. |
8 |
Account setup: allows the various user accounts to be configured according to login levels. |
9 |
Laser pointer: allows a laser tool to be used to simulate a pick in the absence of the robot. |
10 |
Evaluate PPM: allows you to estimate parts per minute (PPM) when using the laser pointer. |
11 |
Software Licence: page for activating software licence. |
INFO keys#
There is an INFO key available at the top right of each of the operating sections. This button has an explanation of the Step By Step procedure. The same procedure can be seen in the video tutorial.