Robot Setup#
This section describes the procedure for configuring TCP/IP communication between the FlexiVision One system and the industrial robot. Proper communication is essential for the exchange of coordinates and commands between the two systems.
Note
Prerequisites
Before proceeding, make sure that:
The robot is switched on and working
The Ethernet cable between VisionController and robot is connected
The robot is configured to accept TCP/IP connections (see robot manual)
You are aware of the communication port configured in the robot code
Access to Robot Configuration#
1 |
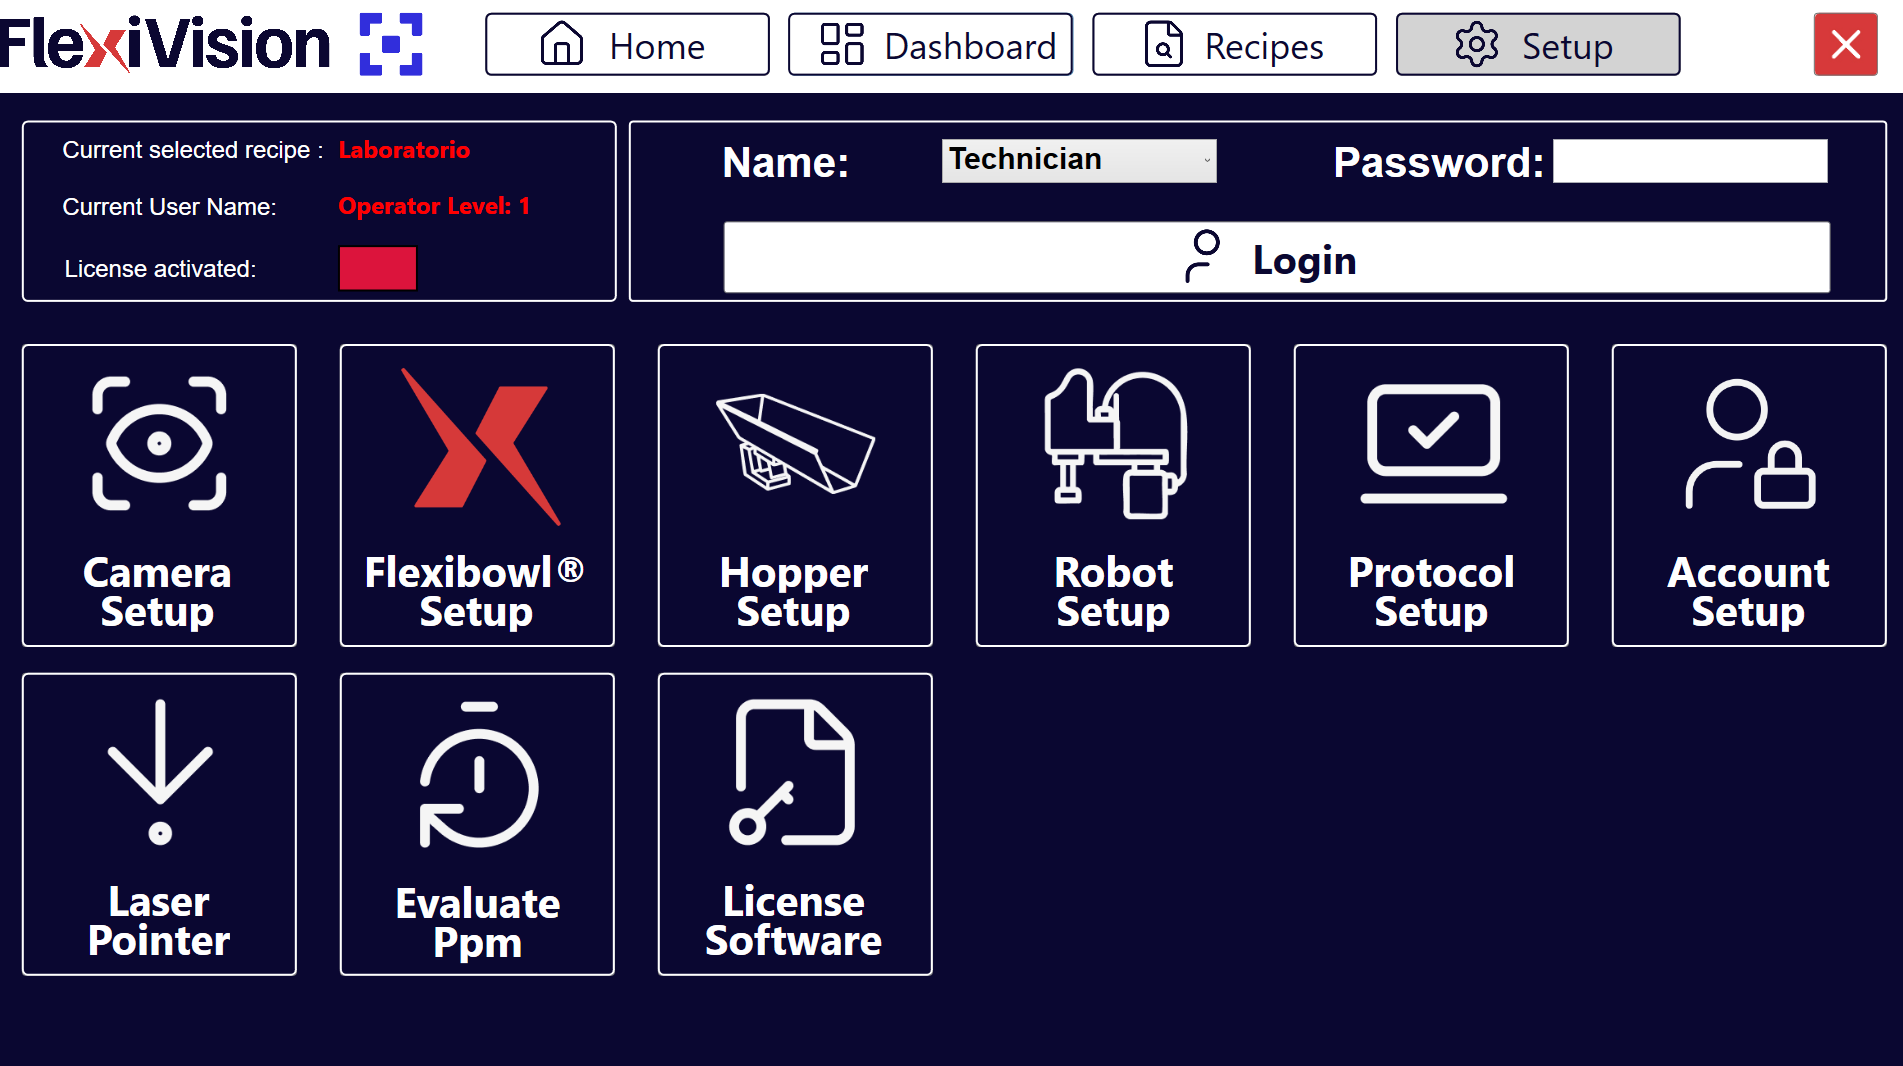
From the home page of the software, click |
2 |
On the SETUP page, identify and click the Robot Setup icon Setup page
|
3 |
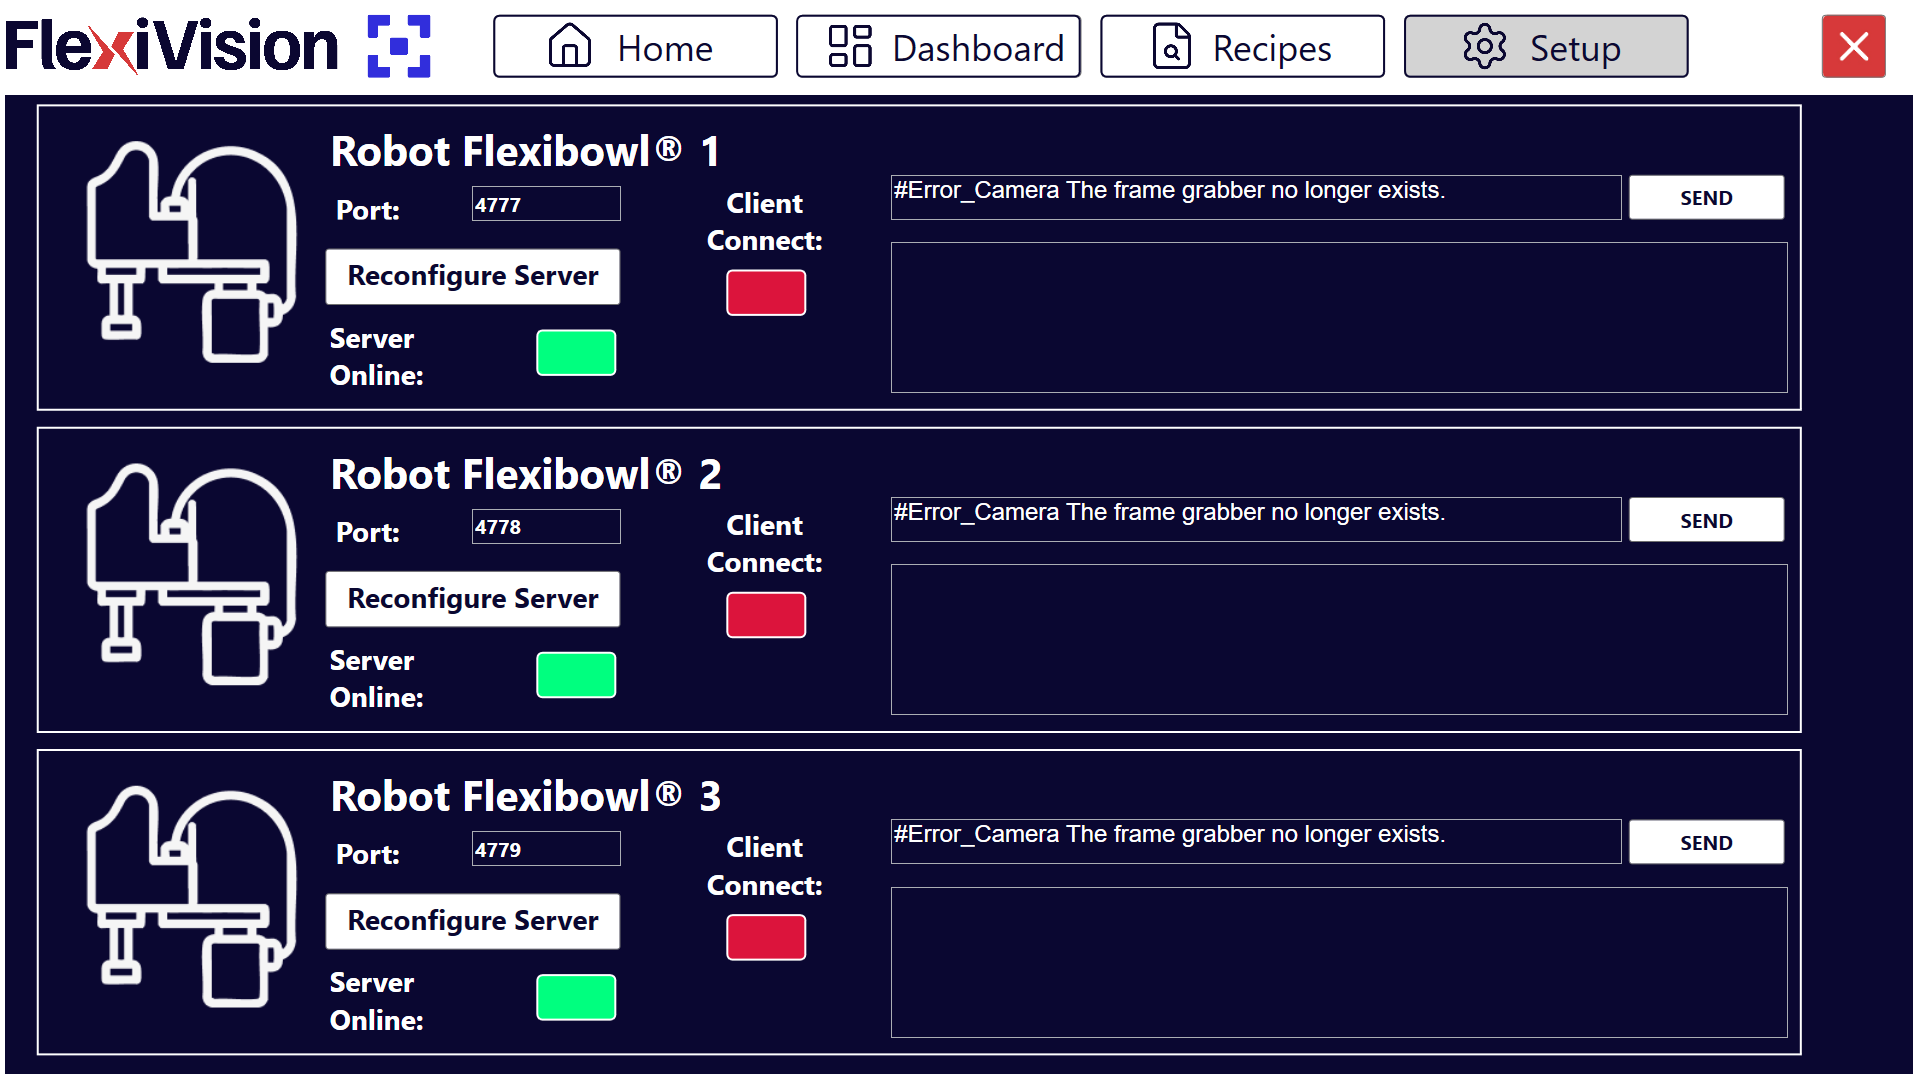
The robot communication configuration page opens |
Robot Setup interface overview#
The Robot Setup page has several sections to configure and test communication:
Section |
Description |
|---|---|
Port |
TCP/IP port the robot communicates with (configured on the robot controller) |
Reconfigure Server |
Button to reconfigure the communication server with new parameters |
Server Online |
Status indicator of the FlexiVision One server (green = server active and accessible) |
Client Connect |
Status indicator of the robot client (green = robot connected) |
Robot-Flexivision Messages |
Log windows showing messages exchanged between robot and FlexiVision One (used for debugging):
|
Configuration procedure#
Step 1: Communication port insertion#
The TCP/IP port is the critical parameter that must match between robot and FlexiVision One:
4 |
In the Port field, enter the TCP/IP port number that the robot will communicate with |
Note
Default value: (FlexiVision One standard port) The port number must be:
The same as configured in the robot program
Between 1024 and 65535 (user ports)
Not conflicting with other services on the network
Warning
It is essential for the port number to be identical on both sides:
FlexiVision One: Port configured on this page
Robot: Port configured in the robot program
If the numbers do not match, the connection will always fail.
Example:
❌ WRONG: FlexiVision One port 2000, Robot port 2001 → No communication
✅ CORRECT: FlexiVision One port 2000, Robot port 2000 → Communication working
Step 2: Reconfiguring the server#
After setting the correct port, the communication server must be rebooted:
5 |
Click the button Reconfigure Server |
6 |
Wait a few seconds for the reconfiguration to complete |
Note
You must click Reconfigure Server each time that:
You change the port number
You want to reboot the server after an error
You have changed the network configuration of the VisionController
You want to force closing of existing connections
The server starts automatically when the FlexiVision One software is opened, but requires manual reconfiguration after changes.
Step 3: Checking server status#
After reconfiguration, check that the server is active:
7 |
Look at the Server Online indicator: |
Green: Server active Red: Server not active |
8 |
After starting the program from the robot, look at the Client Online indicator: |
Green: robot connected Red: robot not connected |
Note
If the indicators are green, the system is properly connected.
If one of the indicators is red, check:
That the program on the robot has been started
That the IP addresses are on the same subnet
That the port is not already in use by another program
System logs for error messages
Step 4: Saving and Completion#
9 |
Check that the robot → FlexiVision One connection is stable |
10 |
The communication parameters are automatically saved |
11 |
Go back to the main SETUP page |
Next steps#
Once the Robot Setup is complete, proceed with: